Free Shipping
 2-Year Warranty
 30-Day Money Back Guarantee


Thank you for choosing to buy a Puraclenz purifier. Activate your 2-year limited parts warranty and receive support from Puraclenz experts.

Placement Guide
Selecting a location where your Puraclenz unit(s) will live is an important step in setting up for air purification success.
Before choosing a location, keep in mind how the ions generated by our Puraclenz Photon diffuse passively throughout indoor spaces.
- A good analogy is a small space heater. The purifying ions diffuse in a space like heat does. The farther you get from the Puraclenz Photon, the lower the ion density (the lower the “heat”).
- Puraclenz Photon ions can travel long distances and will travel away from your unit but they can be absorbed by materials that hold a charge as they move. Examples include synthetics (carpet, fabric on furniture), plastic items, ductwork, etc.
- If you are using multiple Puraclenz Photon purifiers, the diffusion of their ions can overlap. That is good! Plan on placing multiple units so their ions, and effects, will overlap.
- In spaces with ceilings over 12 feet (3.6m), place your purifier unit no higher than 10 feet (3.0m) off the floor. Place purifier on a stable surface, such as a countertop or table. Alternatively, it can be mounted on a wall or ceiling with included mounting kit.
- Purifier will work as designed in typical indoor environments. For best results, we recommend keeping room temperature above 72°F (22°C), humidity between 40% - 70%, and windows closed at all times.
Puraclenz products are built with Next Gen PCO Technology, allowing them to radiate coverage in your space including adjacent rooms as long as doors are always kept at least partially open. Keep your device plugged in a centralized location to enjoy 24/7 ionization coverage.
Fan Speed and Coverage
The Puraclenz Photon purifier has built in variable fan speed, which can be controlled by the 5-Speed Fan Indicator Bar. See diagram below for recommended fan speed based on your floor area.


**At higher fan speeds, the noise level will also be higher to achieve greater coverage area, so consider this when deciding where to position your purifier.
Operation Guidelines
- The Purifier unit should be placed in a central location and always be connected to electric power. Do not connect power cord to a switched outlet or automatic timer that can stop continuous use.
- The Purifier unit is designed to operate 24/7 for continuous coverage. During normal operation you will hear the fan running and power light will be on.
- Purifier will work as designed in typical indoor environments. For best results, we recommend keeping room temperature above 72°F (22°C), humidity between 40-70% relative humidity, and keep windows closed at all times.

**At higher fan speeds, the noise level will also be higher to achieve greater coverage area, so consider this when deciding where to position your purifier.
Wall and Ceiling Mounting Instructions
- Pull the power cord connector through the rectangular hole in the mounting bracket (A). Secure the mounting bracket to the wall or ceiling using the screws positioned in the small ends of the keyholes before tightening the screws (B). See Diagram 1.
- Install the Purifier unit on the mounting bracket (A) and rotate Purifier unit in the counter clockwise direction (B) until you hear an audible click sound. See Diagram 3.
- If an electrical outlet is not available or cannot be used: Unplug the power cord from the Purifier unit and have a certified electrician perform the connection.
- For drop ceiling installation: Always have a certified electrician perform the installation by securely attaching mounting bracket to drop-tile ceiling rail.

 Replacing Your Pre-Filter
Replacing Your Pre-Filter
Pre-Filter Indicator 
How to Replace Photon Pre-Filter from Puraclenz on Vimeo.
We recommend replacing or washing the pre-filter every 6-7 months, depending on your environmental conditions.
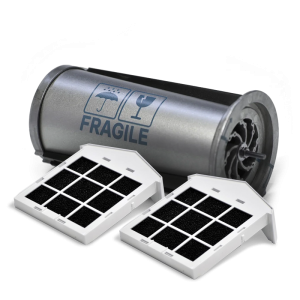
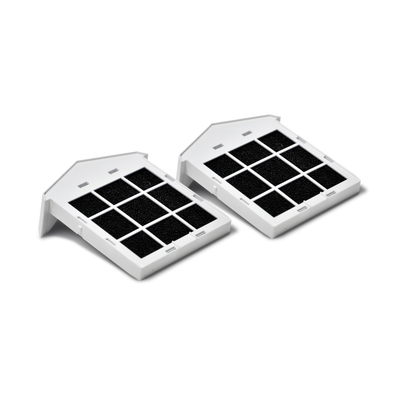
To replace the pre-filter, simply slide the old pre-filter out and discard. Then slide in the new pre-filter (model #R0001) to automatically resume normal operation. See diagrams 1 and 2 below.


Follow these steps to wash your pre-filter
For best results, it is recommended to always use a brand new pre-filter.
- Slide out the dirty filter and set aside. See above diagram 1.
- Slide in new or clean pre-filter to resume normal operation. See diagram 2. An extra pre-filter comes with every new purifier purchase, it can be found in the contents of the original box packaging.
- Take the dirty pre-filter and run it under a faucet to spray off dust and debris. See diagram 3 below.
- Shake excess water off pre-filter and let it dry overnight. Never install a wet pre-filter into the purifier, it may damage the machine. See diagram 4.


Replacing Your PCO Recharge Cell
Recharge Cell Indicator 
How to Replace the Recharge Cell from Puraclenz on Vimeo.
 Disconnect power before doing any work to your purifier.
- Turn Top cover counterclockwise (A) and remove (B). Note: if your purifier is ceiling or wall mounted, be careful not to allow the Recharge Cell to fall out when removing the Top Cover.
- Use your fingers or pliers to slide out the old Recharge Cell from purifier and discard.
- Remove Red Cap from the bottom of the new Recharge Cell (Model #R00002).
- Slide new Recharge Cell into purifier by aligning the side channels.
- Align the Top Cover with the Puraclenz logo 30° counterclockwise to the front of the purifier, as highlighted in diagram 5.
- Then place the Top Cover into the purifier as shown in diagram 6. Twist the Top Cover clockwise (b) until you hear an audible click from the safety latch (circled) to automatically resume operation.


WARNING: Skin or eye damage may result from directly viewing the light produced by the lamps in the Recharge Cell apparatus. Always disconnect power before servicing the Recharge Cell.
IMPORTANT: To prevent injury or damage for all ceiling and wal installations, when removing Top Cover, take care not to allow Recharge Cell to fall out.
Choose "Subscribe and Save 10%" to keep your air fresh year round.
Your purifiers work best when the Recharge Cell and filters are fresh. The Recharge Cell needs to be replaced every 2 years and we recommend replacing your filters every 6 months, depending on your space.

Subscribe & Save 10%

Free Shipping in Contiguous US

Parts arrive when its time to replace

No commitment, change anytime